Rootstock-CLI Deploy
Step 1: Set Up Your Hardhat Project
- Create a New Hardhat Project:
Open your terminal and create a new project using Hardhat. You can initialize your Hardhat project by running:
npx hardhat
- Project Structure:
- After creating the project, your folder structure will look something like this:
├── contracts
│   └── YourSmartContract.sol
├── scripts
│   └── deploy.js
├── test
├── hardhat.config.js
├── package.json
└── node_modules/
Step 2: Add and Compile Your Smart Contract
- Create the Smart Contract:
- Inside the contracts folder, create a new Solidity file (e.g., ContactInfo.sol) and write your smart contract code.
// SPDX-License-Identifier: MIT
pragma solidity ^0.8.0;

contract ContactInfo {
    string public name;
    string public phone;

    // Constructor to initialize name and phone
    constructor(string memory _name, string memory _phone) {
        name = _name;
        phone = _phone;
    }

    // Function to set the name and phone
    function setContactInfo(string memory _name, string memory _phone) public {
        name = _name;
        phone = _phone;
    }

    // Function to get the contact info
    function getContactInfo() public view returns (string memory, string memory) {
        return (name, phone);
    }
}
- Compile the Contract:
Run the following command to compile your smart contract:
npx hardhat compile
You should see a response similar to this:
Generating typings for: 2 artifacts in dir: typechain-types for target: ethers-v6
Successfully generated 8 typings!
Compiled 2 Solidity files successfully (evm target: paris).
This command compiles the project, generating an artifacts folder that contains the compiled data, including the ABI and bytecode for your contract.
├── artifacts
│ ├── build-info
│ │ └── f5da7ce57199502ee2303fea40...
│ └── contracts
│ │ └── ContactInfo.sol
│ ├── ContactInfo.dbg.json
│ └── ContactInfo.json
│
├── cache
├── contracts
│ ├── ContactInfo.sol
│ �└── Lock.sol
├── ignition
├── node_modules
├── test
├── typechain-types
├── .gitignore
├── hardhat.config.ts
├── package-lock.json
├── package.json
├── README.md
└── tsconfig.json
Explore the Artifacts Folder:
- Inside the artifacts folder, you’ll find two subfolders:
build-infocontracts
Note: Ensure that the contract’s file name matches the contract’s name in the Solidity code.
-
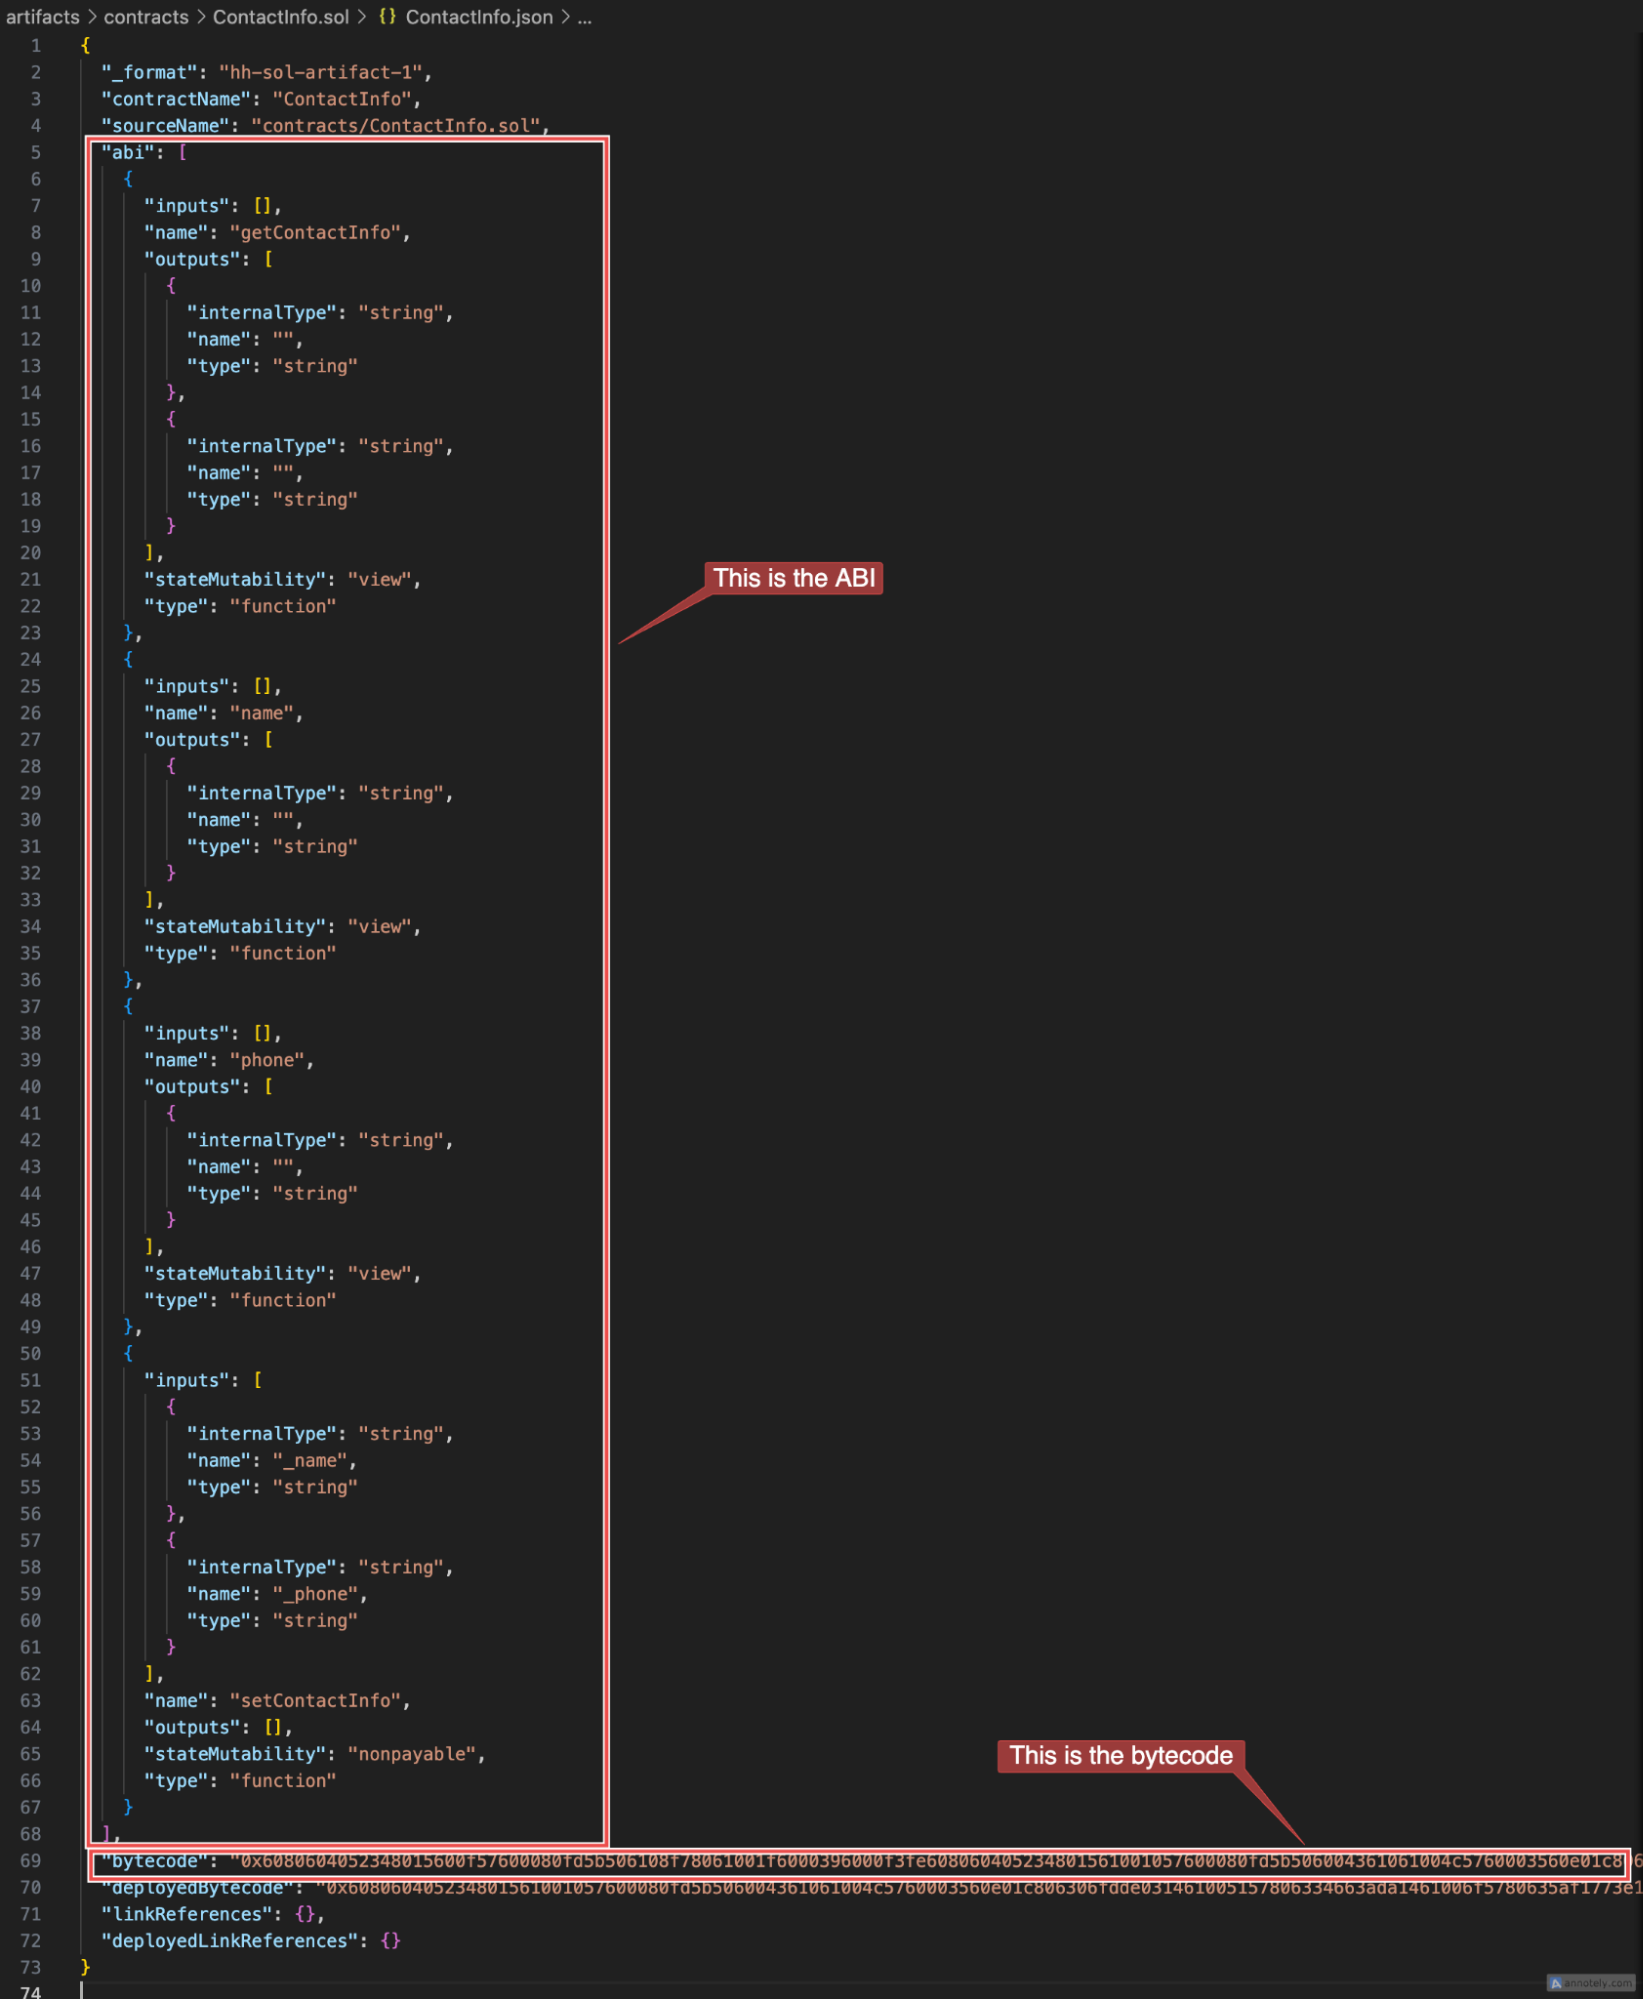
Locate the ABI and Bytecode:
Info- ABI: The Application Binary Interface (ABI) defines the functions, events, and types in the contract, enabling interaction with it.
- Bytecode: The bytecode is the compiled code that will run on the Ethereum Virtual Machine (EVM). This code is deployed to the blockchain.
- Inside the contracts folder, open your contract’s folder (ContactInfo in this case). You will see two files:
-
ContactInfo.dbg.json -
ContactInfo.json
-
-
Copy the ABI and Bytecode:
- Open the ContactInfo.json file. Locate and copy the abi and bytecode, which will be used for deployment.

Save the ABI and bytecode in a new folder. You can name the folder anything, but for this tutorial, you will call it file. Inside this folder:
- Save the ABI as
abi.json.- Save the bytecode as
bytecode.bin(make sure to copy the bytecode without quotes).
You will use .json for the ABI file because the ABI is structured in JSON format, detailing the functions, events, and types used in the contract. This format is easy for applications to parse and use for interacting with the contract.
For the bytecode, we use .bin to indicate it’s a binary file containing the compiled code in hexadecimal format. This file is used directly for deployment, as it represents the actual code that will be executed on the blockchain.
├── files
   ├── abi.json
   └── bytecode.bin
Step 3: Deploy Your Smart Contract
The deploy command allows you to deploy a smart contract on the Rootstock blockchain. This command supports deployment on both the mainnet and testnet.
Now that you have your contract’s ABI and bytecode, you’re ready to deploy it.
-
--abi<path\_to\_abi\>:- This specifies the path to the ABI (Application Binary Interface) file for the smart contract.
- The ABI file contains information about the contract's functions, events, and structure, allowing
rsk-clito understand how to interact with the deployed contract.
-
--bytecode<path\_to\_bytecode\>:- This specifies the path to the bytecode file for the smart contract.
- The bytecode is the compiled binary code of the smart contract. This is what gets deployed to the blockchain.
-
--args<arg1\> <arg2\> ...:- This provides the initial arguments for the contract's constructor.
- These arguments initialize the contract with any required values at deployment, such as setting initial owners, parameters, or other values needed by the contract. > The constructor args are optional depending on your contract
-
--testnet(Optional)
- This flag specifies that the contract verification should be performed on Rootstock’s testnet instead of mainnet.
-
Testnet is used for testing purposes, so developers often use it to verify contracts in a non-production environment before deploying them on the mainnet.
-
Example: If verifying on testnet, use
--testnet.
-
- Mainnet
- Testnet
Use the following command to deploy to the Rootstock mainnet:
rsk-cli deploy --abi <path_to_abi> --bytecode <path_to_bytecode> --args <arg1> <arg2> ...
For testnet deployment, use this command:
rsk-cli deploy --testnet --abi <path_to_abi> --bytecode <path_to_bytecode> --args <arg1> <arg2> ...
This is a sample command to deploy a sample smart contract using the testnet
rsk-cli deploy --testnet --abi files/abi.json --bytecode files/bytecode.bin
In this example:
files/abiis the path to the ABI file.files/bytecode.binis the path to the bytecode file.
After running this command, you will prompted to enter the password of your wallet, after entering it,
You should see a similar response to this:
🔧 Initializing ViemProvider for testnet...
? Enter your password to decrypt the wallet: **********
🔑 Wallet account: 0x05BFa711ef4B2f40855C4E73bA96a8Da86a4be9F
📄 Reading ABI from files/abi.json...
📄 Reading Bytecode from files/bytecode.bin...
✔ 🎉 Contract deployment transaction sent!
🔑 Transaction Hash: 0x0526dbac52e03ade65d0f33a7ced6f68471590c0ae1e1dd6fc415ae56be29d3c
✔ 📜 Contract deployed successfully!
📍 Contract Address: 0x4edd891c2e988e6145fe3e418c652ee33ebab9ae
🔗 View on Explorer: https://explorer.testnet.rootstock.io/address/0x4edd891c2e988e6145fe3e418c652ee33ebab9ae